This card. This was the reason I did poorly on all of my tests on the last week of school. But it was totally worth it. I made this card for Christmas of 2012 for my parents, I know it's a few months late, but I just wanted to put this out there. Considering all the problems I encountered, I think this card turned out pretty good.
Side angle of the card, showing all the paper supports which hold the tree and the fireplace.
Next, we move on to the batteries and the LED lights. This part was tricky. First I went to the dollar store to pick up 4 packs of 3 (12 batteries) 3v button cell batteries. Some problems I had when wiring up the batteries was that whenever I tried to solder the wires to the batteries, it would keep on falling off. I also tried taping it, but it also came undone easily. So I finally thought up of using tiny paper clips to hold the batteries in place with the wires.
So I now that I wired the batteries, lets move on to the LED's. I got the LED's from a broken flash light that I found lying around my house. There were 9 LED's used in this project, but there would have been more if I didn't burn out a couple of them. If you do try to make a project like this, DON'T PUT A 9 VOLT BATTERY WITH ONE LED, IT DOESN'T WORK, IT WILL BURN OUT YOUR LED.
The orange wiring came from an old electricity set of which I also had lying around the house. Next, I used a soldering iron and some solder to have attach the wires to the LED's, and put them in a series circuit. I'm no engineer, but I did manage to wire up the LED's with the batteries with a lot of trial and error.
The beginning of the card. Oh and I forgot to mention, no glue was used in the process of making this card, scotch tape worked best for me, I love scotch tape ^_^.
Concept or the actual card (on a smaller scale) so I would know what the bigger one should look like.
This was the beginning to the fireplace, two sheets of thick paper was used here.
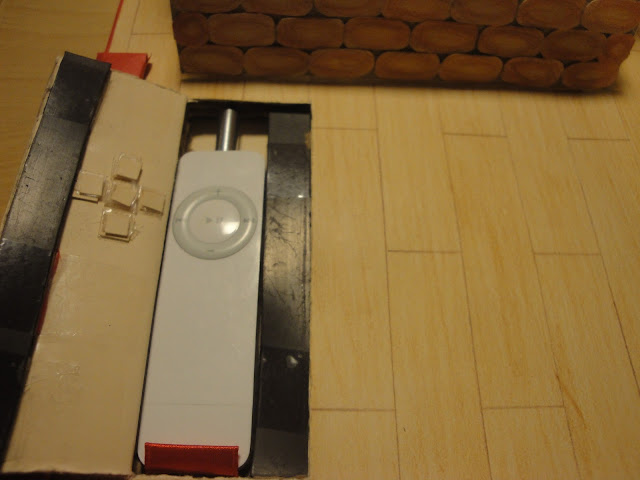
The cardboard was cut out of some boxes. I would later layer these up to make it possible for the iPod, batteries and headphone drivers to fit in the card.
Some of the pop-up layers was too thin so I decided to add another sheet at the back and doubled up on the pop-up part of the card.
I coloured the tree with pencil crayon because I don't really like the vibe markers give off (I wouldn't mind if the marker was used for highlighting the edge). This process took a while, much longer then I expected.
Next, I used the extra scrap from the tree cut out to make the bricks which I also coloured in for the fireplace.
After that, I used scotch tape to stick all the bricks to all the parts of the fireplace.


This is the background for the side with the Christmas tree. I decided to make cut outs, so I would be able to make the background go behind the pop-up layers of the card.
I regret not taking more photos, to show you guys how I actually wired this, but from this photo, I hope you can get a glimpse of what the wiring looks like and how I embedded it into the cardboard.
With the addition of the frame, some decorations, and some finishing touches, the card was ready to be given to my parents. I finished this card at 5 in the morning on Christmas day, I was so happy (:. All in all, this project probably took around 100 hours of time, but it was totally worth it!
Thanks for reading!
Thanks for reading!


