Hey guys! This is my mud house... that I made out of mud! So for this project, it really seemed like a simple task, but I found that I ran into many problems with the properties of mud. Originally, this was supposed to be a 'temporary shelter, made out of things you could find readily available outside, i.e. sticks, mud, twigs, raw materials you can find in nature. But as I continued with this project, it became more and more tedious.


As you can see, I encountered a lot of cracking throughout the entire house and base. This problem is hard to avoid, and the only effective way I found that can be solved is by adding more mud into the cracks. It is important to keep the mud only as moist as it needs to be to knead.


I added a LED inside and wired it to a single switch and battery. I did this the night before the project was due for my architectural design class. This was kind of a last minute addition, of which I only realised that a single LED was too dim to light the entire shelter.

Finding the mud for this project was the first issue I ran into. I believed that as long as mud was moist, I could use it in my project. I found that the mud has to be soft, and solid. If it was too sticky, the mould wouldn't work, and the mud wouldn't be able to form correctly. In hindsight it might have been effective if I used a more tacky mud to fill in the cracks of my project. I found this website to be useful when researching the best ways to prevent cracks on a mud sculpture:
http://wiki.answers.com/Q/When_making_mud_sculptures_how_can_you_prevent_the_mud_from_cracking_or_how_can_you_fix_cracks_in_your_mud_sculptures

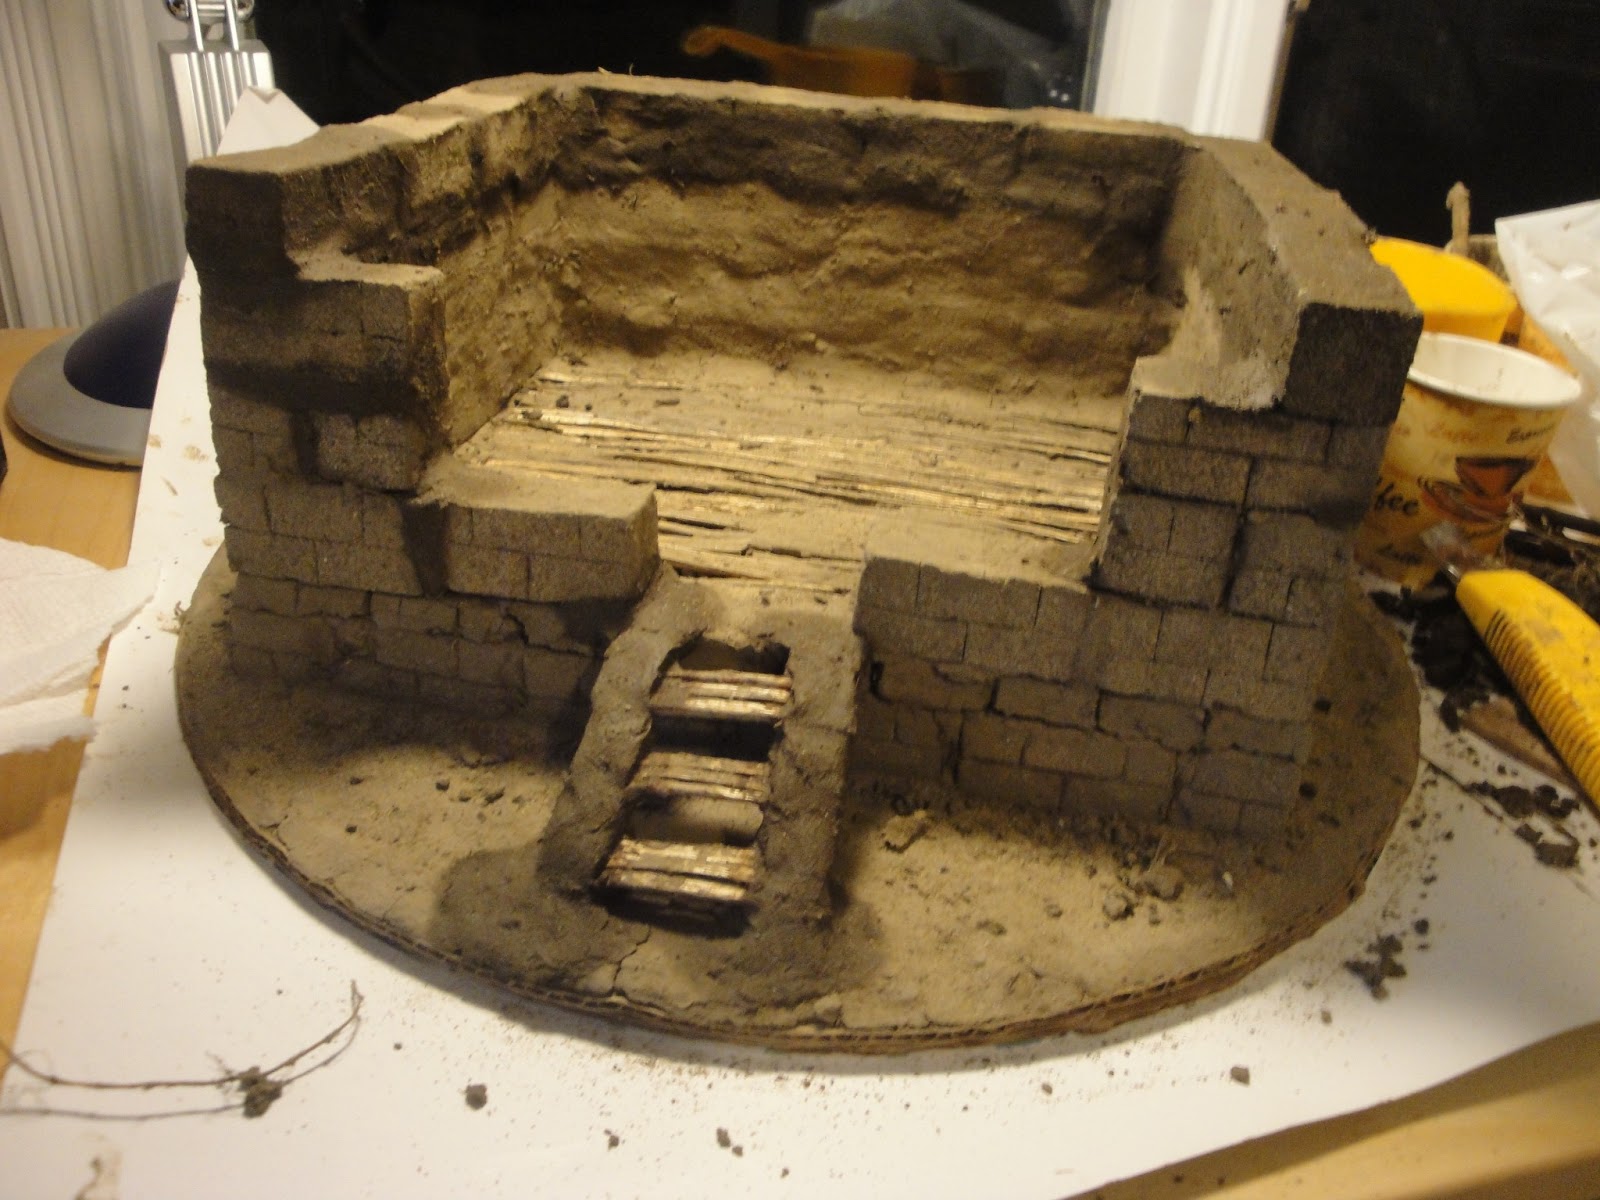
I cannot explain how important the base and foundation are. The time and effort I put into the base was probably the biggest step into building a strong mud house. Throughout this process, I made sure that all the bricks were square to each other and created a uniform rectangle.

I used a mould to make the bricks as square as possible. To make sure that the bricks were solid and would not crack, I would press the mud into the mould and constantly check for dry spots in the mud.

After the bricks were made, I took them out of the mould and coated one side to add some texture to the outside of the house. Then I used an exacto-knife to cut some slits into the bricks for decoration.


Once the foundation and base dried, it started cracking again so I began filling in the cracks with more mud. In hindsight, when I did this I should have made sure that the mud was not too wet, or it would crack again.


The beginning of the base where I used twigs to support the stick flooring.

I used more mud around the supports to make sure that it doesn't fall apart when I'm placing the floor on top.


I made the floor out of mud that I rolled out on a flat surface, then placed the twigs I split across it.


Moving it was a bit harder as I should have anticipated it to stick on the sheet of wood I used. However I found a piece of cardboard I could use to scrape the floor off the sheet of wood.


Once the floor was on top of the supports and the foundation, I added more mud surrounding the project making it flat.


When adding the bricks all around the flooring, I used more mud to make the bricks stick better when drying.


Adding more bricks.


Now, for the roof, this was quite challenging as I had to find a strong way to prevent the roof from sliding off the house.

I decided to make the entire roof out of mud. In addition, I used twigs to make it stronger and so that it would hold its shape when drying. When I shaped the mud, I used a sheet of paper underneath so I could peel it off when I finished. This was much more effective than rolling it out on the sheet of wood (like I did for the floor). See! I do learn from my mistakes! :)


I added another twig to support the roof and to prevent the walls from collapsing in on itself.


I decided to add an LED just for the fun of it :)

Using a soldering iron, a battery pack, a switch and some wires, I made a series circuit. Wrapping all the wires around the corresponding wire, I soldered it all together and voila! A working LED light!


Installing the LED into the house was quite simple. I used mud to hold the wires and switch into place.


I did finish the roof, but I didn't have enough mud to finish the other side so when I tried to put it on it collapsed :(

This was the night before the project was due.. Of course I didn't finish it. But I did stay up until 5 working on it which was a pain. I managed to finish this project 3 hours after I was supposed to hand it in! YAY! Anyways thanks for reading! If you enjoyed this, feel free to share it!